|
This was a big job. We were recently driving through a torrential downpour. No leaks. We stopped for dinner and came back out to the parked RV to find water dripping down the inside of the driver and passenger side front windows. The rear of the RV also has/had a leak at some point as the cabinetry shows water damage. Time to reseal the roof.
The prior owner caulked the roof with silicon caulk. He went overboard really globbing it on, not under any joints, but just as a topical application. This caulk was impossible to get off. I ended up sandblasting the removable parts. Anything not removable just got razor-bladded. I highly recommend anyone doing this job use a sealant that is has a defined method of removal, like rubbing off with gasoline. Silicon is aweful to remove and you know it won't last forever, might as well make it easier on future you.
There are many opinions on the best sealing products to use. I used a variety of different products in different locations.
- Dicor butyl tape - I used this anywhere I could. It is easy to apply cleanly and seals well. And when its time to remove the part or remove/replace the tape, it comes off cleanly. If it leaves residue, you can clean it up with a gasoline soaked rag. Any part that might need to come off in the future got this tape as the sealant.
- Dicor non leveling lap sealant (551LSW) - Caulk that holds its shape. I used this to seal up rivet heads and the rear aluminum joint channel where the fiber-plastic cap meats the aluminum roof and side panels. This stuff can be removed with a putty knife and gasoline but its harder so only use it places you don't intend to take apart later.
- Dicor self leveling lap sealant (501LSW) - Same as above but flows out rather than keeping its shape. I have used this to seal screws heads on the flat horizontal roof.
- Sikaflex 221 - This is an adhesive and sealant. There is no chemcial way to break this down later. Removing this caulk can only be done mechanically. Only use this where the parts should be permanantly joined. I found a couple rivets on the front passenger side of the aluminum roof panel were missing, allowing that panel to lift up and let water in. I generously applied sikaflex then riveted that panel back down. I never intend to separate that joint again.
- Eternabond roof seal tape - A primary seal. The seal is permanent but can be removed by heating up the tape, pulling off what you can, then using a gasoline soaked rag to remove the rest of the residue. I used this on the long roof joints that run side to side across the front and rear of the RV roof. The tape is white, the RV roof is green, so the tape stands out and thus I only use this where it is least likely to be seen.
A couple other tips I applied to this job.
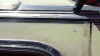
- There is an aluminum rail that covers the roof to wall joint, one on each side of the RV.
- I soaked the screws overnight in penetrating oil, slightly tightened then loosened the screws, then soaked them more. When I finally removed the screws days later, none broke, thus no time spent extracting screws.
- I installed new screws. #10-24 x 3/4" button socket head screws in 316 stainless steel. SS won't adversaly react with aluminum and won't rust in the rain.
- The screws themselves allow water to enter the RV by the threads. I wanted to seal the screws but still allow everthing to easily dissassembled later. My solution was to get some #10 washers with neoprene on one side and stainless steel on the other, AKA bonded sealing washers. The rubber seals against the RV roof and the threads of the screw. Yet you can still easily remove the screws later if needed.
- The aluminum rail only needs butyl tape on the top half of the back side. If water gets into the lower half, you want it to flow right out. If you seal the lower half, you risk trapping water in the middle which is EXACTLY where you don't want it
Rivets
- The roof panel is riveted down with 3/16" diameter rivets. I found a grip length of 1/2" worked fine
- My awning was riveted down with a bazillion 5/32" diameter rivets. I had to use a couple different grip lengths for various holes. In the unlikely event you have the same awning with holes drilled in the same spacing as mine, get a variety pack of 5/32 rivet grip lengths.
Products for removing prior seals.
- Silicone caulk: The prior owner went overboard with silicon. I tried box store products designed to "remove" silicon caulk. In truth, it just softens it up so that hopefully you can remove the entire strip in shot. Nothing worked to soften up the silicon on my roof, perhaps from years of exposure to the sun. I used a scraper to remove it and I hurt the paint in the process.
- Factory sealing tape under aluminum roof to wall channel cover: This was like a foam tape enfused with tar. It came off easily. In the places were it left a residue, I found that Goo Gone spray gel worked great. It was quick to clean up and got all the residue off
- Butyl tar on front and rear caps: At the front and rear of the channel above you have 3 inch caps that hide a mega joint where the roof, wall, and fiber-plastic cap all come together. At the factory they jammed this area full of black tar-like substance which I assume is butyl tape. Again, Goo Gone spray gel makes quick work of that substance. Scrape off what you can, then use the spray gel to clean up the rest.
- I tried Klean Strip caulk remover and Goo Gone caulk remover. Neither worked on anything I tried them on. A waste of money.
This entire project took me probably 20 hours of labor over few weekends. I don't know yet how successful all this sealing was. But I am hopeful. The roof of the GMC motorhome is well designed with few points of potential water ingress.
Overall the final list of things that got re-sealed:
- The front passenger area of the aluminum roof where rivets had gone missing
- Rivet heads under the aluminum roof to wall cover
- Rear fiber-plastic to aluminum channel
- Underside of the aluminum roof to wall wall cover
- Screws secruing aluminum roof to wall cover
- Underside of the roof mounted awning
- Under and inner foam gaskets for rear red and front yellow roof marker lights
- The side to side joints where the aluminum roof meets the front and rear fiber-plastic caps
Movies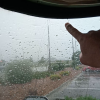
RV water leaks during downpour.mp4 (102.7MB)
Roof.m4v (137.5MB)
Pictures
Preview Image Size
|